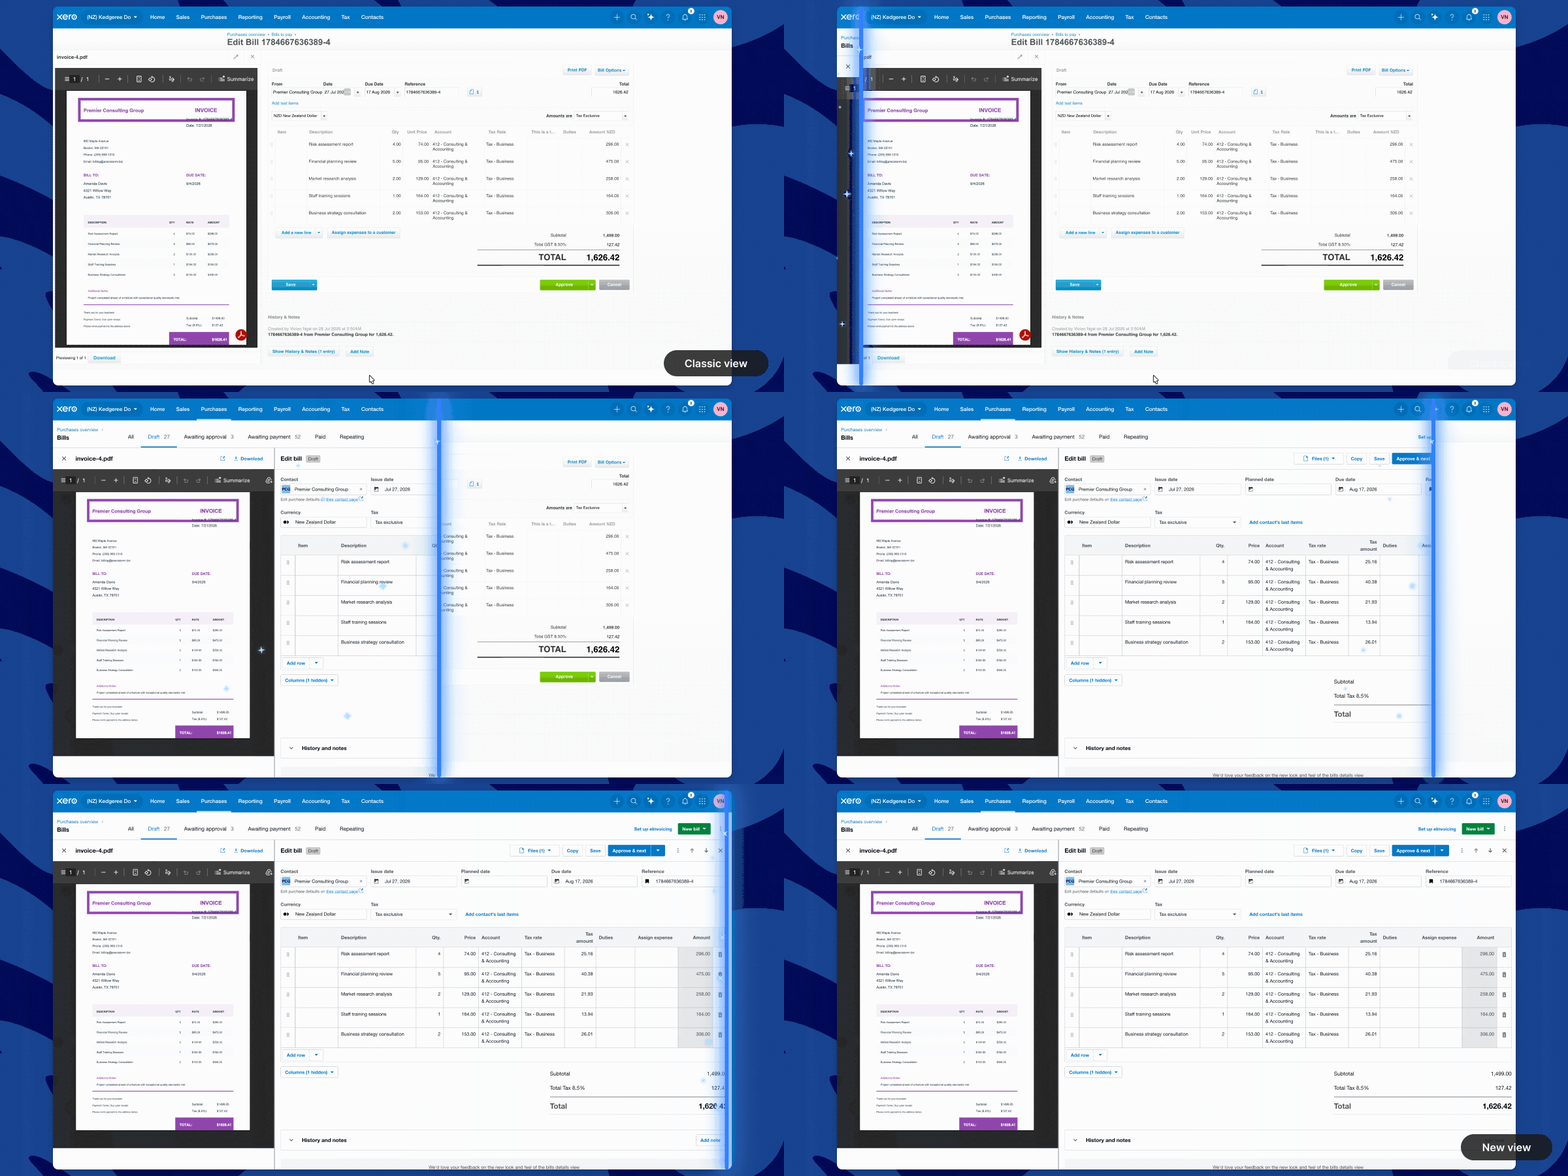
The bill detail pages are getting an upgrade. We’ve refreshed the classic bills experience by bringing the best features from Quick View into a full-page view, giving you the focus you need when reviewing your bills.
Starting today, we’re gradually rolling out a new full-page experience for viewing and editing existing bills in Xero. Your workflow for creating draft bills remains unchanged for now.
In the new bill experience, you can update contact information and planned payment dates without leaving your bill. Tailor the table columns to suit your needs, just like in Invoices or Quotes, and drag to resize the file preview for more space. If you prefer Quick View, you can still access it by selecting the eye icon in the “View” column of the Bills list.
Why we made this change
Our goal is to improve your bills workflow, while making it faster and easier for us to bring you more improvements, more frequently. Updating the bill detail page also means our newer, modern capabilities aren’t just limited to Quick View.
It also brings bills closer to the experience you already see across other modernised accounting documents in Xero, helping create a more consistent workflow across the product.
The capabilities behind this experience have already shown time-saving benefits in Quick View, with customers reporting that it can save around “20 seconds per bill.” Bringing those same foundations into a full-page experience means more customers can benefit from that work in the way that suits them best.
What you can do in the new bills experience
The modernised page includes several highly requested features to help you work faster:
Direct contact editing: You can now update your contact information or change contact details right inside the bill view.
Smart cash flow with payment dates: Use the new planned date field to organise your bill payment schedule and manage your business cash flow with ease.
Instant payments: If you’re in the UK or US, you can pay your bill right from the bill detail view to save yourself even more time.
Custom layouts: You can show or hide specific columns in the line item grid and even adjust the file preview pane size to fit your monitor.
Purchase defaults: Did you know you can set up your supplier’s default purchase settings, specifying account codes, tracking categories, and more, streamlining your bill creation process? We’ve added a direct link for quick access to add or edit these via the “Edit purchase defaults on their contact page” link under the Contacts field.
Looking ahead
We plan to update the Create page view soon so you can enjoy these same great benefits across all bills pages. This update also allows us to build new, highly requested features to make managing bills faster and more intuitive, so you can spend less time on admin and more time on your business.
Comparison: What is changing?
To help you understand the transition quickly, here is a breakdown of how your experience is changing from Classic:
Screen layout
Changes:
The ability to “Copy” a bill has moved to the bill header.
“Go to bill source” is now tucked under line items.
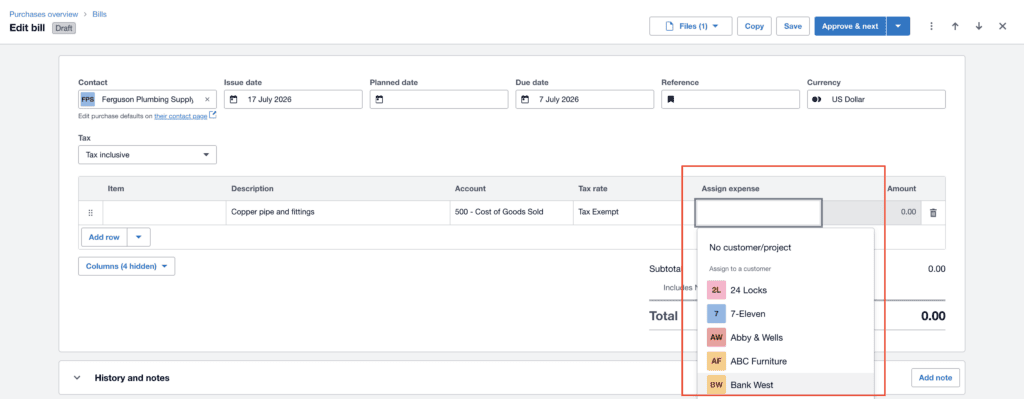
“Assign billable expenses” is now a column in the item table, so you can assign expenses without the extra clicks.
The editable “Total” field is now also in the amount summary area, alongside the calculated bill total.
“Apply credit” is now found in the amount summary, alongside the bill total and any applied payments.
For UK and US customers, “Record payment” is in a separate tab in the Payments section
Updating Supplier details
Old way: You had to add or edit supplier information on a separate Contacts Edit screen
New way: Select the contact, then “Edit” to add or update supplier information without leaving the bills page
Payment planning
Old way: You could only add or edit planned payment dates from list view or Quick View.
New way: A dedicated “Planned date” field within the bill itself to help you plan your bill payment runs.
Workflow speed
Old way: You had to click back to the list and select the next bill manually to keep working.
New way: When you open bills from the list view to review, the “Approve & next” is now the main choice to help you power through your bill list faster. There are also arrow buttons to speed up how you navigate directly through your bills without needing to go back and forth from the list.
Assign billable expenses
Old way: You had to open a separate modal and manually assign a project or expense to each item, one by one.
New way: Directly assign billable expenses in the line item table by setting the customer or project in its dedicated “Assign expense” column.